Blog - Classic

17th July 2008 EP3 How-To Guide's

Rear bumper & light removal

Original thread here: http://www.civictype-r.co.uk/forum/viewtopic.php?f=112&t=161228

Author: paulydixon

It’s probably possible to fit rear lights without removing the bumper, but why bother, it takes minutes to take the bumper off anyway.

First two are located under the rear bumper

Image

Second lot are located under plastic body coloured caps at the point where the lights meet the bumper, 10mm bolts

Image

Next are the three screws fastened into the lower rear splitter

Image

Last screw is located in the upper wheel arch, nipping the bumper onto the bodywork

Image

And hey presto, it almost falls off in your hand. It’s actually easier taking these to bits than french cars

Image

I only really wanted it off so i could try these older lights on, i’m unsure if i like them or not now though…

Image

The lights themselves have 3x 8mm nuts which are easy to remove, they’re accessable by removing the plastic trim in the boot. But they also have 2x 10mm nuts located behind the bumper

Image

Here’s a before, during and after

Image

Image

Image


17th July 2008 EP3 How-To Guide's

Replacing front brake disks

Original thread here: http://www.civictype-r.co.uk/forum/viewtopic.php?f=112&t=71545

Author: Timo 

Firstly use the excellent ‘how to replace front brake pads’ by dieselpower, which can be found here.

http://www.civictype-r.co.uk/forum/viewtopic.php?t=11529

In addition to the tools that are needed, you will need an impact driver to remove the brake disk retaining screws.
You won’t need the rope to tie the calliper back as you will be removing it from it’s mount completely.

Carrying on from step 3 in the above ‘how to’, at the point
where the bottom calliper retaining bolt is removed.

After removing the lower calliper bolt, remove the upper calliper bolt and
remove the calliper from it’s mount. If you removed the brake pipe
retaining bolt as in dieselpower’s ‘how to’, you will be able to move the
calliper towards the front of the wing, so it’s not in your way.

Image

You then need to remove the two 17mm calliper mount bolts.
The calliper mount can then be removed. Clean the brake pad spring clips
and apply copper grease to them ready for refitting.

Image

Next you need to remove the two brake disk retaining screws using an
impact driver. It is very difficult to remove these with an ordinary screw
driver.

Image

Once removed the brake disk can be replaced with the new one. Important NOTE – Wash your hands before taking the new disks
out of the box and fitting them, to reduce any dirt or grease coming into contact with the disk surface.
If you do get them dirty, clean them with brake disk cleaner fluid.

Line up the two beveled screw holes on the new disk with the
holes on the wheel plate.

Image

Replace the brake disk retainer screws after applying some copper
grease to the threads. Use the impact driver to tighten them fully.

Replace the calliper mount and the brake pads. Using a calliper rewind
tool, refit the calliper over the pads as mentioned in dieselpower’s how to.

Image

Replace the wheel and repeat for the other side.

Image

Important NOTE – When rewinding the calliper make sure the brake fluid resevoir doesn’t overflow. If you think it will either remove some of
the fluid or wrap a towel or rag around the resevoir.

Pump the brake pedal a few times to get the callipers back into position and check brake fluid level, before driving off.

Remember to avoid heavy braking for the first 200 miles, so the disks and new pads can be bedded in correctly.

Hope this is of some help and a huge thank you to dieselpower for the brake pad ‘how to’.

Tim.

17th July 2008 EP3 How-To Guide's

Fitting facelift headlights to a prefacelift car

Original thread: http://www.civictype-r.co.uk/forum/viewtopic.php?f=112&t=140796

Author: omni & Matty McRae

I’ve decided to put a thread up here because I get quite alot of questions about this from people interested in doing the conversion, so rather than keep having to re-do it all in PM’s, i’ll stick a thread up here and I can just link them.

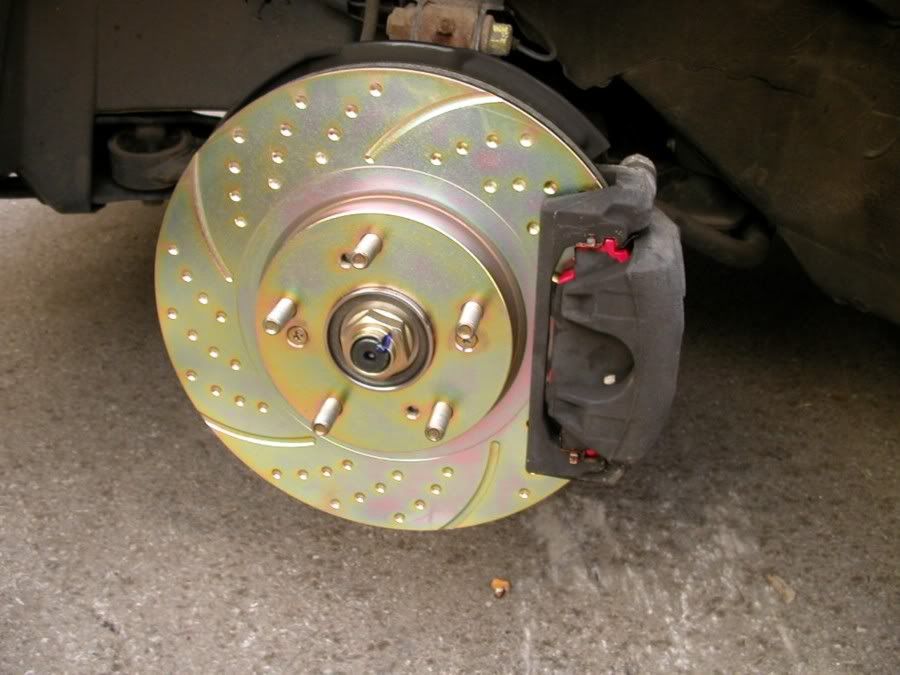
So, before I start, i’m affraid I don’t have any really detailed photo’s of the nitty gritty bits, so I may have to cross-reference other threads for specific jobs, like removing the front bumper etc. Most of the actual taking apart and putting back together is pretty obvious though, and if you’re the type that isn’t mechanically or electrically minded and struggles with removing a few nuts and bolts, i’d probably recommend you don’t try this conversion ;)

So – Start off by removing your front bumper. (unfortunatelty the guide I used first time I did it now seems to have disappeared forever so maybe someone else provide a link if they know of one)

Then remove the old headlights, its fairly obvious where all the bolts are which hold these in.

I have a list of part numbers and prices of bits which I used for the conversion, they are as follows.

All prices are EXCLUSIVE of VAT

1 x 33101-S5T-E62 – Right hand headlight unit – £80.37 ea
1 x 33151-S5T-E62 – Left hand headlight unit – £80.37 ea
2 x 33115-S84-A11 – HB3 main Beam bulb – £4.02 ea
2 x 33126-S0A-003 – Cover Rubber – £8.44 ea
2 x 33126-S6A-J61 – Cover Rubber – £6.60 ea
2 x 33303-SAA-003 – Indicator bulb holders – £5.45 ea
2 x 33303-S2R-003 – Indicator Orange bulbs – £1.18 ea
2 x 33305-S5A-003 – Side-light bulb holders – £4.85 ea
2 x 33116-SD4-961 – Headlight bulb Holders – (Optional) – £7.49 ea

So thats everything from Honda – which comes to a grand total of £236.80 –

(£278.24 inc VAT)

The reason I say the last bulb holders are optional is because some people reckon you need to buy them and modify them to hold the HID bulbs in, personally I don’t think its necessary, I never used them on mine and they are held in fine just by slightly bending the metal clips.
so you can potentially lose about £20 off that bill. Obviously if you’re not going for HID’s you need them and some H1 bulbs. (34901-SZ3-000 £5.64 ea)

Fit all the bulbs and seals into the light units (If you are using HID then you will need to bend the metal clips slightly to hold in the HID bulb units, but this will all become apparent when looking at it. If you’re not satisfied with bending the clips, you can follow the guide for fitting HID’s to a Facelift found here)

Now for the wiring, when you offer the new lights up you will notice straight off that the plugs for the indicators are different, so far as I know you can’t buy new ones from honda seperately (without the loom!) so I went to a scrapyard and found some suitable ones from another vehicle (just take the bulb holder down with you and have a root round) Same with the plugs for the new main beam (HB3) bulbs, you will need to be a little creative here when sourcing these parts.

The Side lights plug straight on, as do the headlight adjustment motors, but helpfully the plugs for these are part of the same loom, so because the adjustment motors are in a different position on the facelift lights they don’t reach! Easiest thing to do here is to cut the two wires for the sidelight plug and extend them by approx 8 inches so they reach.

Once you’ve found some suitable indicator plugs – cut off the originals and splice on the new ones. (I personally prefer to solder and heat-shrink all the wires I cut and rejoin, but its up to you, you can use connectors if you don’t have a soldering iron.)

Next up, you need to modify the original car headlight wiring, because we’re changing from an H4 Hi/Lo bulb for both headlights and main beam, to seperate bulbs. You have to do this otherwise when you go to full beam the projectors will go out, which is not only rubbish for driving with, but also an MOT failure.

You need a standard 4 pin switching relay, a couple of reels of 8amp cable, an inline fuse (or, as I have done, a relay with integrated fuse) and a few various spade connectors. All available from halfords.

I’ll assume we’re using HID’s here, if you’re not the wiring is the same, but instead of connecting the wires to the HID ballasts, you’ll simply be connecting them straight to the H1 headlight bulbs.

Mount the Ballasts on the inner wings, negative side of both ballasts goes to a suitable earthing point (somewhere on the body or engine which is not painted) Obviously it goes without saying to make sure you keep all wiring away from rotating pulleys and hot bits of the engine…

On the original wiring plug you’ve got 3 wires, one of them will be live when you switch the headlights on, the other two are switchable earths. One of them will be an earth when your in headlight position, one of them will be an earth when you’re in main beam position. You need to identify which is which with a multimeter – I can’t remember what the colour codes are off hand. but I believe they are discussed in Mr Bilko’s thread here

Once you’ve done that, the wire which is an Earth when you’re on headlights is not needed (as these will now be permanently earthed) so you can tape it up and forget it. On the passenger side, find a suitable place to mount the relay.

You wire up pin 30 of the relay to a permanent feed from the battery (Via an inline fuse holder if you don’t have a fused relay) and pin 87 to one side of your mainbeam bulb. On pin 85 you wire in the live feed from the cars original wiring plug and also piggy back this off the positive side of your HID ballast. Pin 86 goes to an earth. Terminal 87 goes to one side of your main beam bulb the other side of the main beam bulb goes to the switchable main beam earth from the original car loom.

The other side is only ever so slightly different – identify which wire is which again from the cars original plug, wire in the live to the positive side of your HID ballast (the other side goes to a permanent earth as above) the switchable main beam earth goes to one side of the HB3 main beam bulb, and for the other side of the main beam you bridge a wire across from Pin 87 on the relay.

for clarity and ease of reference i’ve included Mr Bilko’s wiring diagram here.

Image

Once you’re satisfied everything is working refit the headlights and bolt them in – you’ll have to use the metal bars off the bottom of the old lights – they fit straight onto the new lights – and refit the bumper.

Thats about all I can think of for now, but I will review it later and see if i’ve missed anything.

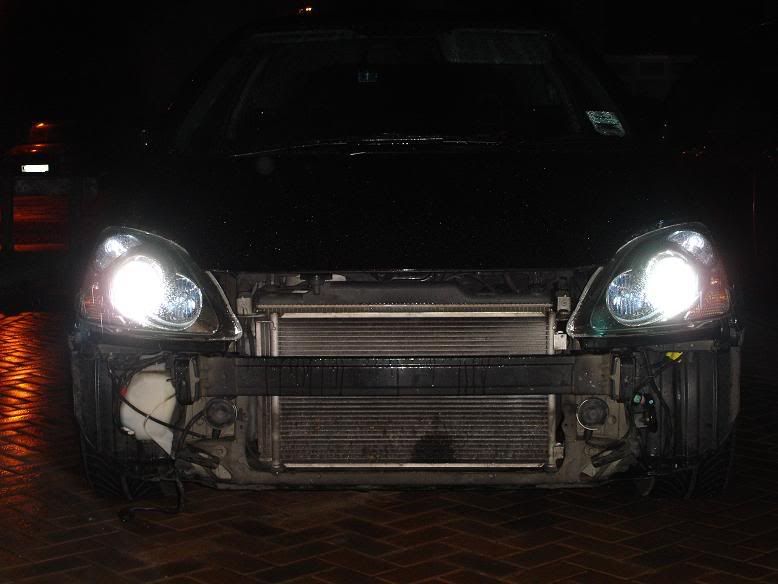
As I say, I don’t have any detail photo’s unfortunately, once I get going I don’t have the patience for stopping and phtographing every little bit – but here is some photo’s from my original thread – which can be found here – viewtopic.php?f=39&t=118420

Car stripped down
Image

Test fitting headlights
Image

As you can see, I mostly work in the dark, this is because i’m so impatient and cannot possibly wait until the weekend to finish it…
Image

Let there be light.
Image

Image
Bumper back on
Image
Image


 Following this guide here: viewtopic.php?f=112&t=140796&p=1925267#p1925267

Didnt use a relay though as it’s not needed IMO

i couldnt find parts needed, connectors for indicators and full beam bulb holders from scrappy so what i done was bought some bits from halfords to wire it all up. didnt use a relay, just split the possitive feed (red/yellow cable) to the (+) on each full beam and dipped beam bulbs, then the original switchable earth from full beam (red/ blue cable) to the (-) on the full beam and ran a permanent earth to the (-) of the dipped beam to stop them going out when full beam is selected, so taped up the red and white cable as it wasnt needed

I got mini spade connectors and some 8amp wire and a cripming tool/wire strippers from halfords and bullet connectors to join and extend wires. put the mini spade connectors on the pins of the hb3 full beam bulb and the indicators then taped them up to water seal them and keep the cables from coming off.

On the last pics, you can see all i need to do at that stage is twist-fit all the bulb holders into the lights and plug the HID cableing in, with the kit, the wiring for the (+) and (-) are spade connectors so thats why i have spades on the end of my cableing from my split live and perm earth 🙂

was all quite easy really :lol:

Image

Image

Image

Image

Image

Image

Image

Image

Image

Image

Image

Image

Image

Image

Image

17th July 2008 EP3 How-To Guide's

Replacing rear brake pads

Original thread: http://www.civictype-r.co.uk/forum/viewtopic.php?f=112&t=15520

Author: Mr Bilko!

This is my “How to” method of changing rear brake pads on our CTRs.
If you feel confident enough to take the job on it’s straightforward taking approximately 30 mins.
If you’re unsure then please don’t try this at home because the braking system is the most important safety related issue on the car, and this job requires a moderate skill level in auto technology.

Tools required are:
19mm wheelbrace (the 1 in the toolkit will do) and locking nut key
17mm & 12mm combination spanner
Cars body jack, or preferably a trolley jack
Axle stand(s)
Brake piston wind back tool (not essential) like ‘Franklin TA890’
Brake pad grease

1 Place the car on an even surface with the handbrake on and slacken off the wheelnuts.

Image

2 Chock the opposite side front wheel, using blocks or weights like these if you’re tuff an well ‘ard :lol:

Image

3 Jack up the car and place an axle stand under the suspension arm, then remove the wheel and put it aside. Yes, I know, I’m cheating but a trolley jack makes it easier :wink:
Now release the handbrake.
Image

4 Undo the top and bottom caliper to carrier bolts using the 12mm spanner, and holding the sliding pin with the 17mm spanner.

Image

5 Undo the flexible brake hose mounted to the suspension using the 12mm spanner. (It’s easier if you have a 12mm socket and ratchet)

Image

6 Start to wind back the piston, so that the new and thicker pads will fit in, until a firm resistance is felt. You can also use a G clamp and a pair of mole grips to turn and push the piston back instead of this tool.

Image

7 Make sure the piston looks exactly like this when wound back.
This is because the back of the inner pad has a pip on it that lines up with the piston, so if the piston isn’t at 12 o’clock, it won’t fit over the pads!

Image

8 Here’s that pip.

Image

9 Remove the pads, and when re-fitting, apply a small amount of high melting point grease (copaslip or similar) to the top and bottom of the pads as seen here.

Image

Refit the caliper once the pads are in and then refit everything in reverse order from 5 to 1
Do the same for the other side and that’s the job done and dusted :wink:

As you can see, I’ve not replaced my pads, but illustrated “How to” do them, and hope it explains it to you.
If anyone has any questions feel free to post below or pm me.

17th July 2008 CTRO site stuff

How to use the search function effectively

I am just about to post a new topic

Whoa, whoa whoa, hold your horses. Back away from the keyboard for a few seconds.

There are a finite number of induction kits, exhausts, ECU’s, bodykits and modifications on the market for the EP3, the FN2 and the FD2.

This means, in all likelihood, that the thread you are about to start and the questions you are about to ask have been asked and answered before many, many, many times.

Ok, so where do I start?

Well the first thing to do is to kick back, relax, grab a cup of tea and start reading. Yes, that’s right, do your own research. If you have to ask what induction kit to buy, or which is the cheapest, or the most powerful, or which one is the best or the loudest, then you should LURK MORE and make your own mind up.

How do I LURK MORE?

There are 2 main ways.

1) The first is to start with the sticky FAQ’s at the top of the page. These are the most commonly asked questions on the most popular induction kits available.

2) The second is to browse the various pages. There are currently 2823 individual topics, 28855 posts and 57 pages of people asking the same questions you are about to ask in this very forum section. You can browse the various pages by using either the top or the bottom list of pages, thus:

Image

Look where the arrows are pointing. Yeah, those are pages. All 57 pages have lots of threads on.

Hang on, I need an answer yesterday, I don’t have time for this!

We have a solution for this!. It’s what we forum regulars call “the search function”. Yeah you’ve probably heard of it. But your question is too important to type into a search box, or perhaps you just don’t know how to use it. Well I’m gonna show you both methods anyway.

1). This is what we call the quick search.

Image

Just type your search term and click search. For example here, I have searched on the term: GruppeM (a popular induction kit)

Image

Ooh look, loads of results, and the search term is highlighted in red!

But wait a second, it gets better than that! Lets say I want to narrow down my search to display posts about cleaning GruppeM. Well that works too!

Image

Amazing! In just a few seconds, I have reduced 1883 results down to 17!

Image

Wow, evilowl that’s incredible. Do you have any other search tips?

Well it’s funny you should ask, because yes, I do. It’s what we forum regulars call the “advanced search”. You can see the link in the top right hand corner of your screen and it’s on every single page

Image

Lets say, for example, I wanted information on the GruppeM cowl. So we type it into the search box:

Image

This is where the magic happens. First, from the drop down menu select the sub section of the forum you want to search in. Hint: choose the Air Induction bit

Image

Then below that, select to display results as topics and click search

Image

OMGZWTFBBQ look what has happened! Amazing no? 5 results and look they are in topic form. Hurray for evilowl!

17th July 2008 CTRO site stuff

Important guidelines for protecting buyers & sellers

All,

Buying on the internet can be a good and inexpensive way to get second hand (and new) goods. Large numbers of people trade on this forum daily and the majority of transactions go well, however some do not.

As with all things there are a minority of people that will use this site to Scam people, or who will just be too lazy to send goods to you, and in some cases the postal system fails and the goods never arrive. So I have decided to write a guide to try and help people..this is a first draft so will hopefull evolve with time.

1) We are not Ebay..if something goes wrong with a sale, then the mod team will try hard to help you out, but we do not have the powers of a bank, or the ability to refund money like paypal/Ebay.

2) When purchasing/selling an item, check how many posts the user has made, how long they have been a user for, look at any feedback they have and have a look at some of their recent posts. New people who have little posts, and no feedback are obviously more risky than people who have been on the site for years and sell things regularly.

3) When purchasing an item, try an insured method of payment such as paying with a credit card via paypal. If the product does not arrive you may be able to claim the money back from the card company. This is especially important if the seller has little history on the site.

Its also worth noting that if you decide to pay direct into someones bank account there is normally a definate trace to a payee and so you may be able to get your cash back by going to the small claims court.

4) When selling ensure you are paid in full for the product before sending.

5) I advise all items to be sent via recorded delivery, and insured. If the item never arrives this protects both the seller and the buyer.

6) When buying/selling gather as much info about the other user as possible (name/address/phone etc) so you can easily contact them outside of the forum if needed.

7) Look out for the following signs of a dogy seller:

Little history on forum
Negative feedback
Will only accept payment direct to a bank account
Reluctant to let u pick the item out, despite claiming to live locally.
Prices too good to be true
Will not show proper picture of the item

8) If you think you are being scammed contact the Mod team ASAP. They can at least stop the user from scamming on here again, and maybe able to get more information to help you.

Hope this is of use, and will hopefully help reduce the number of scammers operating on this forum.

17th July 2008 CTRO site stuff

Cars for Sale section rules & guidelines

In addition to our forum wide policies, the following rules have been drafted and will be enforced by moderators and administrators.

The For Sale section is provided for the benefit of individual members to buy and sell items, not for businesses to make money.
Businesses are not allowed to use the For Sale section unless they have Trader status. PM mods/admin for details.

1. The car should be clear of any finance attached to it eg hire purchase liabilities, lease commitments etc – if there is still finance outstanding then this must be explicity stated.

2. A sale thread’s initial post must state a firm asking price. Of course you can haggle, but an initial price must be stated. A post simply asking for offers or conducting a PM auction is not allowed. A price must be stated in initial post.

3. Leave an email address for contacting.

4. The thread CANNOT be a link to an Ebay auction (or any similar off-site auction), or a jump page that leads to an Ebay auction. The CTROF Classifieds space is not meant to be used to gather attention to a potential bidding war.

5. “Thread crapping” will not be tolerated. If you do not intend to buy and have nothing positive to add to the sale, refrain from posting in the thread. This includes stating “the price is too high”, if you think the price is too high, inform seller via the PM service or an E-MAIL. If you think your post may be in any way interpreted as being “thread crapping” then take the safer route and send your message via PM or E-MAIL to the seller.

6. Most importantly, buyer and seller beware.

7. One bump a day please….pick your time wisely.

8. Once a sale has been completed it is the sellers duty to change the title of the thread to have “SOLD” at the beginning or end of the title.

_______________________

*PLEASE NOTE*
These rules can and will be modified at anytime, offenders who say “oh but i didn’t know” will not be immune to these rules. As a user of this forum it is your responsibility to know the rules and abide by them, or you simply will not be allowed to participate. Use of CTROF Forums is a privilege granted to users by forum moderators.

One more thing. Since it is physically impossible for us to be here all the time, you can help us out. If you see a post that violates one or more of the above rules, please click the “Report this post to a moderator.” Posts that violates the above rules the post will be deleted without notice. Multiple violations can lead to banning.

Make sure to get all the persons info you’re trading from , name , phone number , address , call them and verify things. Have them call you to verify on caller id. Dont use or trust yahoo/hotmail/freebie mails. Make sure its their isp email , ask them to email you from and for them to even verify a code sent to them via there email so you know theres is real is well.

** WAYS To Prevent getting ripped off. **
Do not buy from new users.
Do not buy from users with just a few posts.
Do not buy from someone without going back and reading some of there previous sales or feedbacks. Ask for proof of good feedback from the forum.

Get all details , phone number , name & address , confirm it. Call them or have them call you. Get an email from them.

Ask for any sort of credentials. Links to an ebay account for feedback. Verify the same email address.

After you buy from a user.
Go back to there thread , give a detail of the transaction. If its a Good , neutral or Bad Experience.

If anyone has any suggestions for this section, feel free to PM the Moderators.

Thanks in advance,

Moderators.

17th July 2008 CTRO site stuff

For Sale section rules & guidelines

In addition to our forum wide policies, the following rules have been drafted and will be enforced by moderators and administrators.

The For Sale section is provided for the benefit of individual members to buy and sell items, not for businesses to make money.
Businesses are not allowed to use the For Sale section unless they have Trader status. PM mods/admin for details.

1. You cannot charge VAT on top of an already stated price, charging VAT would imply that you are a business and thread will be removed.

2. You cannot sell something you do not have in your immediate possession. That means you cannot sell items on behalf of other people. Get your friends to sign up themselves if they wish to sell items on this forum

3. We do not allow adverts for any of the following :
Alcohol
Tobacco
Drugs/pharmaceuticals
Pornography
Weapons
Goods that may infringe copyright
Sale of items that you have obtained for free ie PAYG SIM cards unless you are only asking to cover postage costs

4. A sale thread’s initial post must state a firm asking price. Of course you can haggle, but an initial price must be stated. A post simply asking for offers or conducting a PM auction is not allowed. A price must be stated in initial post.

5. Leave an email address for contacting.

6. The thread CANNOT be a link to an Ebay auction (or any similar off-site auction), or a jump page that leads to an Ebay auction or another advert for your item. The CTROF Classifieds space is not meant to be used to gather attention to a potential bidding war. Advertising Ebay item numbers or other methods of identifying online auctions of items are also prohibited.

7. “Thread crapping” will not be tolerated. If you do not intend to buy and have nothing positive to add to the sale, refrain from posting in the thread. This includes stating “the price is too high”, if you think the price is too high, inform seller via the PM service or an E-MAIL. If you think your post may be in any way interpreted as being “thread crapping” then take the safer route and send your message via PM or E-MAIL to the seller.

8. Most importantly, buyer and seller beware.

9. Do not bump more than once every 2 or 3 days….pick your time wisely.

10. Once a sale has been agreed it is the sellers duty to finalise the deal to enable feedback for both parties.

_______________________

*PLEASE NOTE*
These rules can and will be modified at anytime, offenders who say “oh but i didn’t know” will not be immune to these rules. As a user of this forum it is your responsibility to know the rules and abide by them, or you simply will not be allowed to participate. Use of CTRO Forums is a privilege granted to users by forum moderators.

One more thing. Since it is physically impossible for us to be here all the time, you can help me out. If you see a post that violates one or more of the above rules, please click the “Report this post to a moderator.” Posts that violates the above rules the post will be deleted without notice. Multiple violations can lead to banning.

Make sure to get all the persons info your trading from , name , phone number , address , call them and verify things. Have them call you to verify on caller id , Ship with verifications and signatures needed , keep an open line of communication. Don’t trade/sell something and become unavailable. Don’t use or trust yahoo/hotmail/freebie mails. Make sure its their isp email , ask them to email you from and for them to even verify a code sent to them via there email so you know theirs is real is well.

** WAYS To Prevent getting ripped off. **
Do not buy from new users.
Do not buy from users with just a few posts.
Do not buy from someone without going back and reading some of there previous sales or feedbacks. Ask for proof of good feedback from the forum.

Get all details , phone number , name & address , confirm it. Call them or have them call you. Get an email from them.

Ask for any sort of credentials. Links to an ebay account for feedback. Verify the same email address.

After you buy from a user.
Go back to there thread , give a detail of the transaction. If its a Good , neutral or Bad Experience.

If anyone has any suggestions for the Classifieds section, feel free to PM the Moderators.

Thanks in advance,

Moderators.

Translate »