- Wed May 19, 2010 9:41 pm
#2547262
As the title says this is a quick tutorial on how to colour code your Pre-facelift headlights..
I know this has been done before a million times but i decided to do mine the other day and thought i'd document each stage and share my knowledge and experience in performing this headlight modification.
Also i would just like to point out before anyone considers following this "How To" thread that i take no responsibility if anything goes wrong, this modification takes abit of common sense and if you find it hard to change a sidelight then STOP reading now and close your web browser.
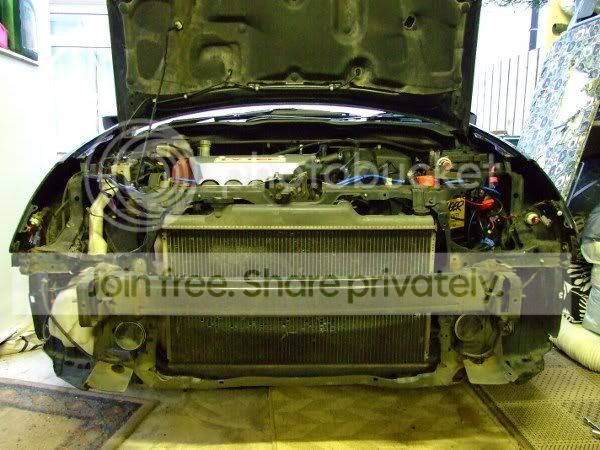
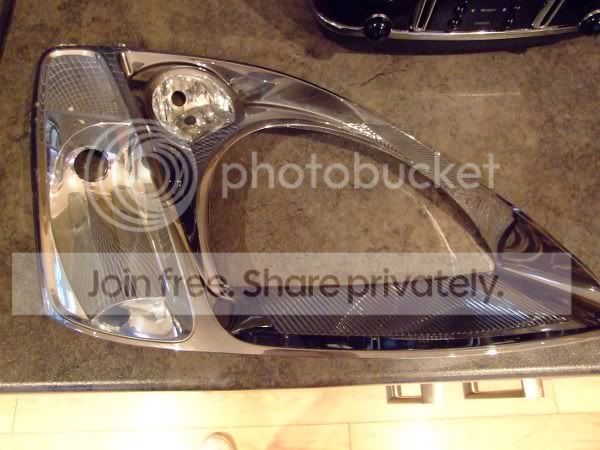
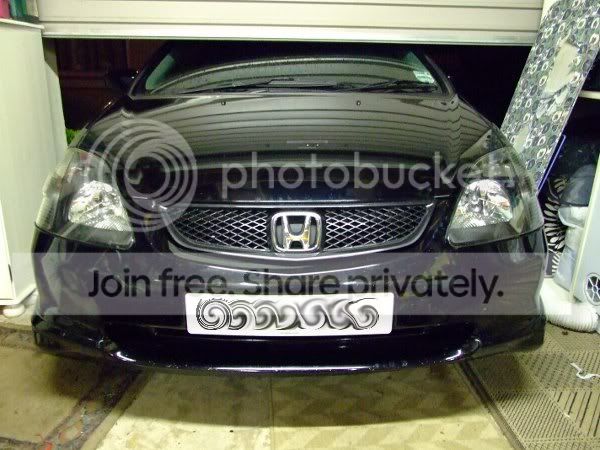
STEP 1: Remove front bumper and headlights (I used existing "how to" threads & tips to do so)
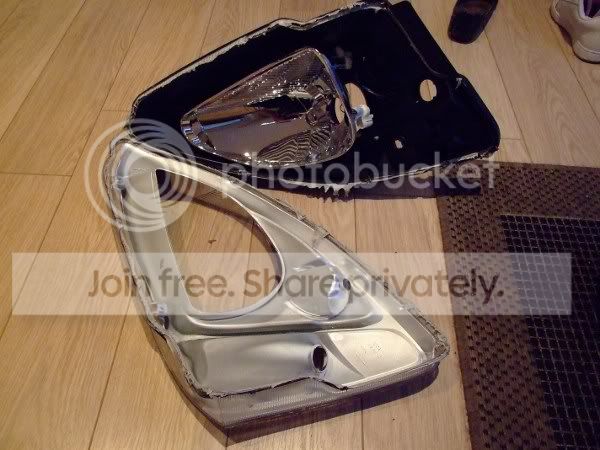
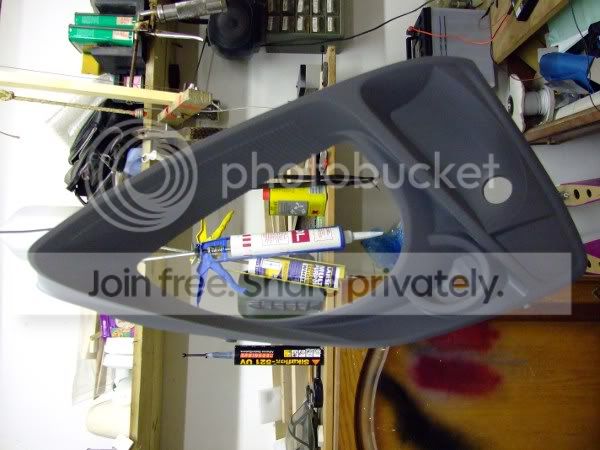
when bumper and headlights are removed you should be left with this...

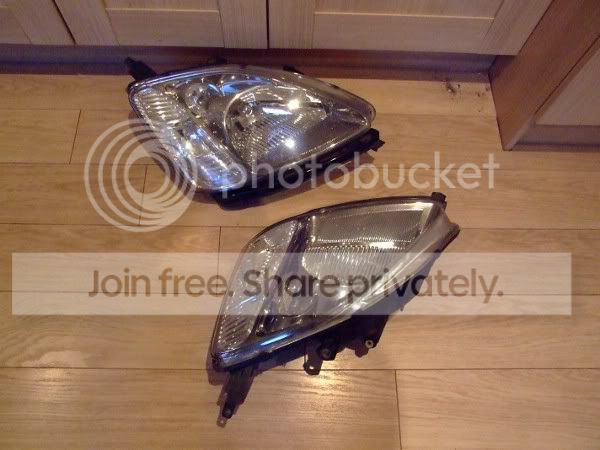
And a pair of these...
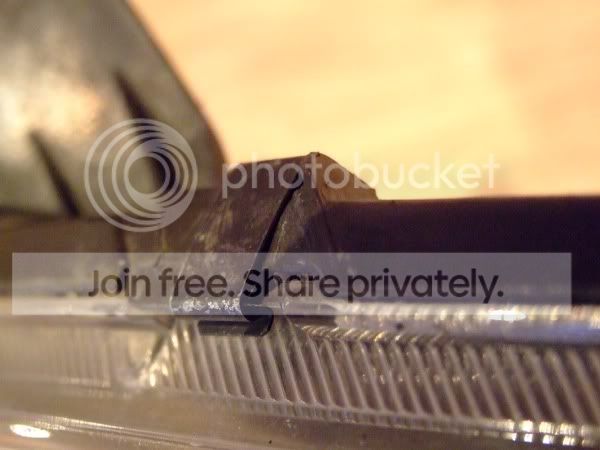
STEP 2: Before cooking, remove any bulbs and also the 5 clips situated around the lense...
NB: take these clips off now because they will be very hot when just out of the oven.
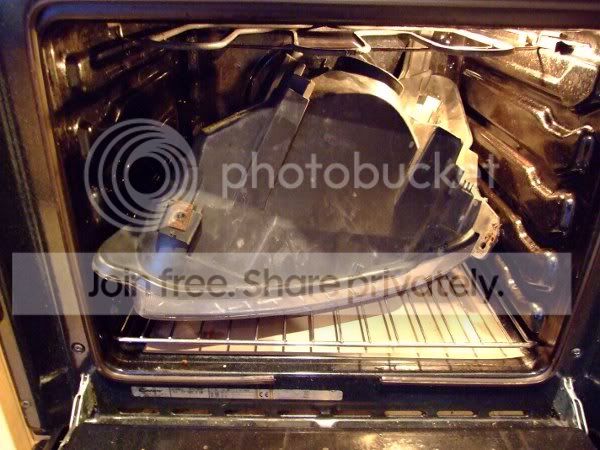
STEP 3: Preheat oven to 140degress and carefully place headlight into oven and cook for 4-5mins
NB: Be cautious not to place headlight against rear or sides of oven and also be careful
not to totally melt headlight, if you smell plastic get it out quick!!!
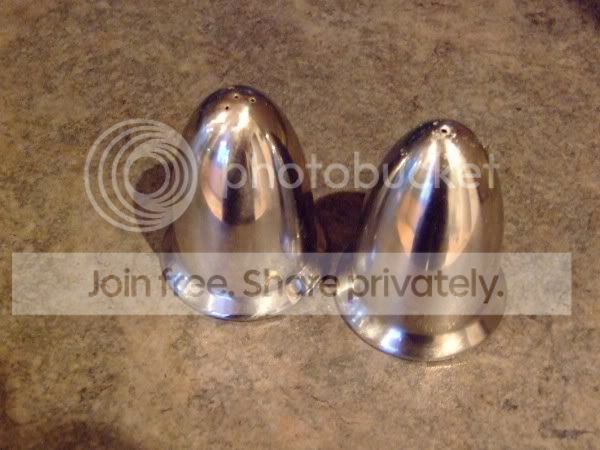
STEP 4: Season your headlight to your required taste... for example Salt/Pepper
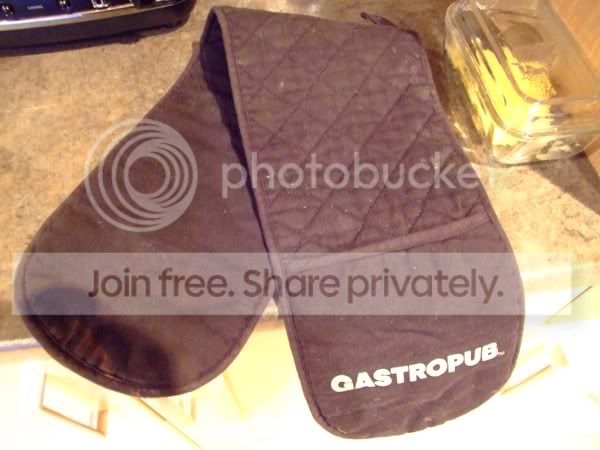
STEP 5A: Grab a pair of these
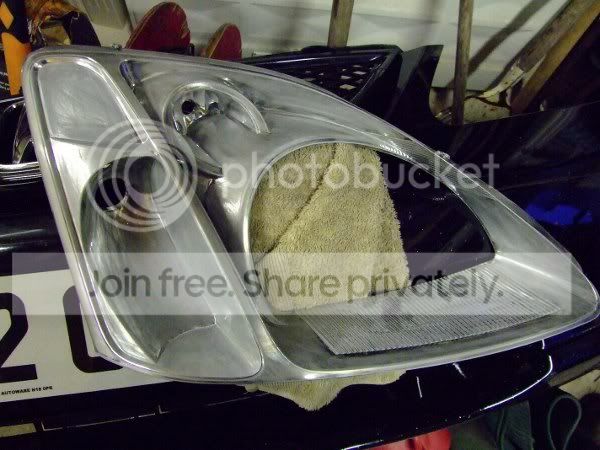
STEP 5B: Remove headlight from oven (Using your protective mitts) and prize open headlight
with screwdriver, pull both ends apart from eachother so that the glue is still spread out evenly around the seal.
should look something like this...
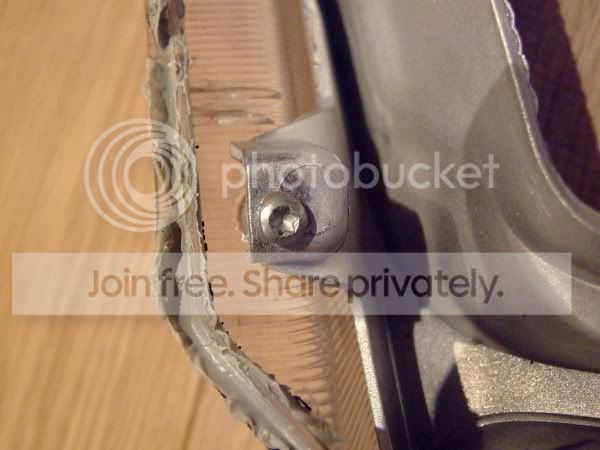
STEP 6: For this you will need a Torc head bit/screwdriver/allen key and remove the 2 screws
holding the chrome reflector inside the lense...
This is the part we want to colour code...
STEP 7: Rub down both Reflector lenses with 600g sandpaper until majority of chrome
finish has gone and your left with an almost grey finish..
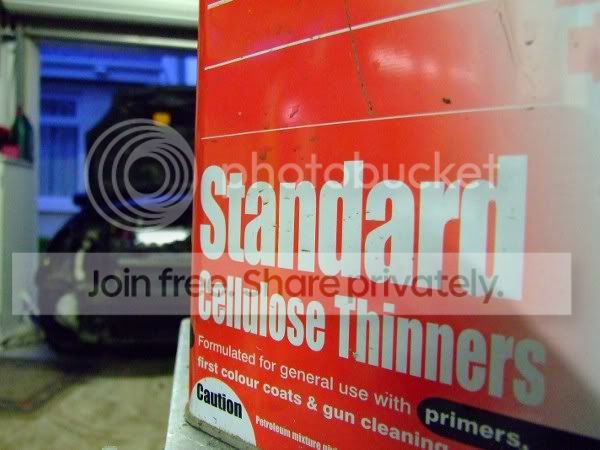
STEP 8: Prepare your lense for paint, i used thinners on a clean cloth to remove any grease/dirt/dust
from the surface on the lense to reduce any reactions when the primer/paint is applied..
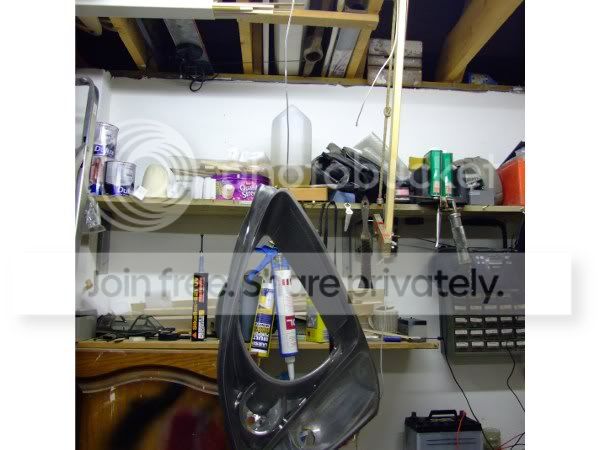
STEP 9: Hang your lenses up by using string or metal coat hanger and hook onto one of the screw holes
on the rear of the lense, this will allow you paint freely without worrying about touching the lense to get better angles..
STEP 10: Ready for primer base coat, i went for 3 coats of primer and allowed 30mins between each coat.
NB remember to spray evenly and not too close to the lense to prevent "runs" in the paint.. you can always add another coat on, you cant take one off.
STEP 11: Ready for paint :thumbup: i went for Halfrauds Satin Black as i wanted to almost keep that
subtle mat black OEM look.. I done 3 coats again with the Satin Black and allowed to dry
STEP 12: Once both lenses are fully dried, you can now rebuild your headlight, refit 5clips and restart the oven
process to allow the glue to heat up and reseal your headlight again.. once you have done this
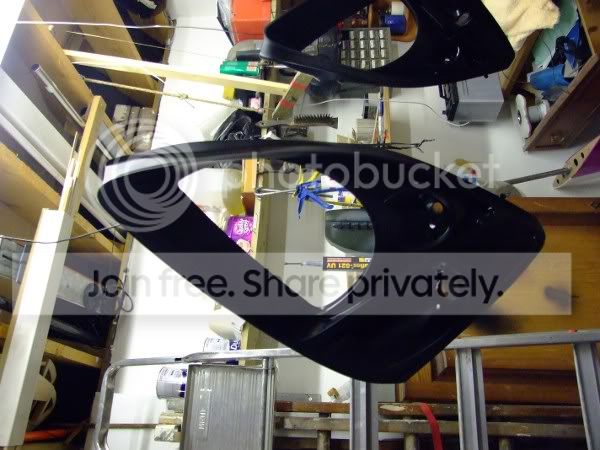
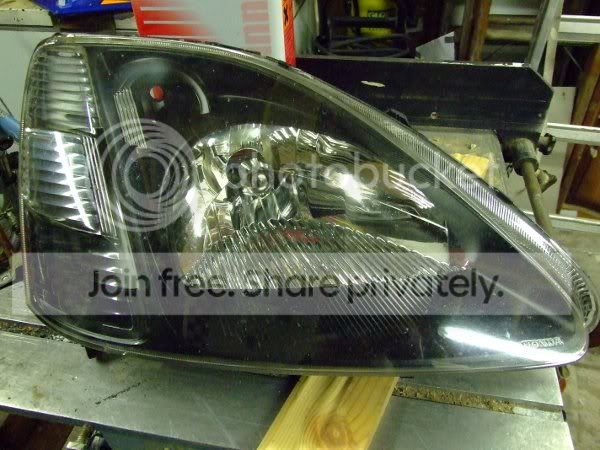
your headlight should look something like this..
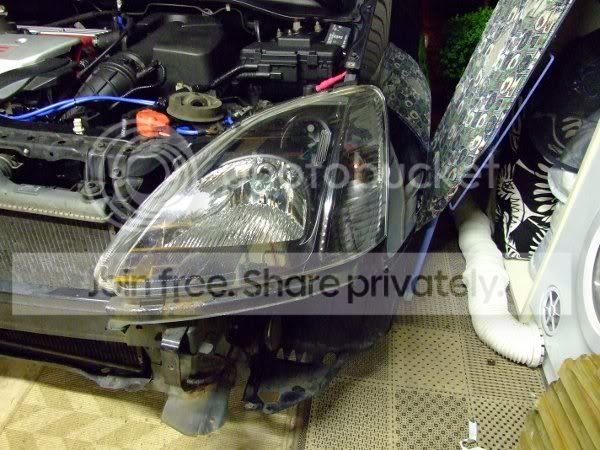
STEP 13: Refit your lights..
STEP 14: Refit your bumper and sit back and enjoy the evilness hehe
Hope this How To thread helps at least one person :salut:
Ohh and also excuse the sport grill long story
I know this has been done before a million times but i decided to do mine the other day and thought i'd document each stage and share my knowledge and experience in performing this headlight modification.
Also i would just like to point out before anyone considers following this "How To" thread that i take no responsibility if anything goes wrong, this modification takes abit of common sense and if you find it hard to change a sidelight then STOP reading now and close your web browser.
STEP 1: Remove front bumper and headlights (I used existing "how to" threads & tips to do so)
when bumper and headlights are removed you should be left with this...
And a pair of these...
STEP 2: Before cooking, remove any bulbs and also the 5 clips situated around the lense...
NB: take these clips off now because they will be very hot when just out of the oven.
STEP 3: Preheat oven to 140degress and carefully place headlight into oven and cook for 4-5mins
NB: Be cautious not to place headlight against rear or sides of oven and also be careful
not to totally melt headlight, if you smell plastic get it out quick!!!
STEP 4: Season your headlight to your required taste... for example Salt/Pepper
STEP 5A: Grab a pair of these
STEP 5B: Remove headlight from oven (Using your protective mitts) and prize open headlight
with screwdriver, pull both ends apart from eachother so that the glue is still spread out evenly around the seal.
should look something like this...
STEP 6: For this you will need a Torc head bit/screwdriver/allen key and remove the 2 screws
holding the chrome reflector inside the lense...
This is the part we want to colour code...
STEP 7: Rub down both Reflector lenses with 600g sandpaper until majority of chrome
finish has gone and your left with an almost grey finish..
STEP 8: Prepare your lense for paint, i used thinners on a clean cloth to remove any grease/dirt/dust
from the surface on the lense to reduce any reactions when the primer/paint is applied..
STEP 9: Hang your lenses up by using string or metal coat hanger and hook onto one of the screw holes
on the rear of the lense, this will allow you paint freely without worrying about touching the lense to get better angles..
STEP 10: Ready for primer base coat, i went for 3 coats of primer and allowed 30mins between each coat.
NB remember to spray evenly and not too close to the lense to prevent "runs" in the paint.. you can always add another coat on, you cant take one off.
STEP 11: Ready for paint :thumbup: i went for Halfrauds Satin Black as i wanted to almost keep that
subtle mat black OEM look.. I done 3 coats again with the Satin Black and allowed to dry
STEP 12: Once both lenses are fully dried, you can now rebuild your headlight, refit 5clips and restart the oven
process to allow the glue to heat up and reseal your headlight again.. once you have done this
your headlight should look something like this..
STEP 13: Refit your lights..
STEP 14: Refit your bumper and sit back and enjoy the evilness
Hope this How To thread helps at least one person :salut:
Ohh and also excuse the sport grill
Last edited by RoSs-K20 on Sat May 29, 2010 6:57 pm, edited 2 times in total.
I'm so JDM i even import my women [smilie=gt_grinz-browwiggle.gif]
PSN ID: RoSs-VtEc-Yo
PSN ID: RoSs-VtEc-Yo